Looking to unlock the secrets of programming your garage door opener with a LiftMaster remote? Don’t worry, we’ve got you covered! In this guide, we’ll show you step-by-step how to program your LiftMaster remote to work seamlessly with your garage door opener. Whether you’re a tech-savvy teenager or just curious about how things work, you’ll find all the information you need right here.
So, you’ve got a LiftMaster remote and a garage door opener, but you’re not sure how to get them working together. No problem! We’ll walk you through the process and make it as easy as pie. With just a few simple steps, you’ll be able to open and close your garage door with the touch of a button. Say goodbye to manually lifting that heavy door!
Ready to dive in? Great! Let’s get started with the first important step: preparing your garage door opener for programming. This is where the magic begins, and before you know it, you’ll be the master of your garage domain. So, grab your LiftMaster remote and let’s get down to business!
1. Locate the “Learn” button on the LiftMaster opener.
2. Press and release the “Learn” button.
3. Within 30 seconds, press and hold the desired button on the LiftMaster remote.
4. Release the button when the opener lights blink.
5. Test the remote to ensure successful programming.
Follow these simple steps and enjoy the convenience of operating your garage door opener with a LiftMaster remote!

How to Program a Garage Door Opener with a LiftMaster Remote: A Step-by-Step Guide
Are you tired of manually opening and closing your garage door? Programming a garage door opener with a LiftMaster remote can bring convenience and ease to your daily routine. Whether you’re a beginner or have experience in programming devices, this guide will walk you through the process, ensuring a smooth setup. From understanding the basic components to step-by-step instructions, this article has got you covered.
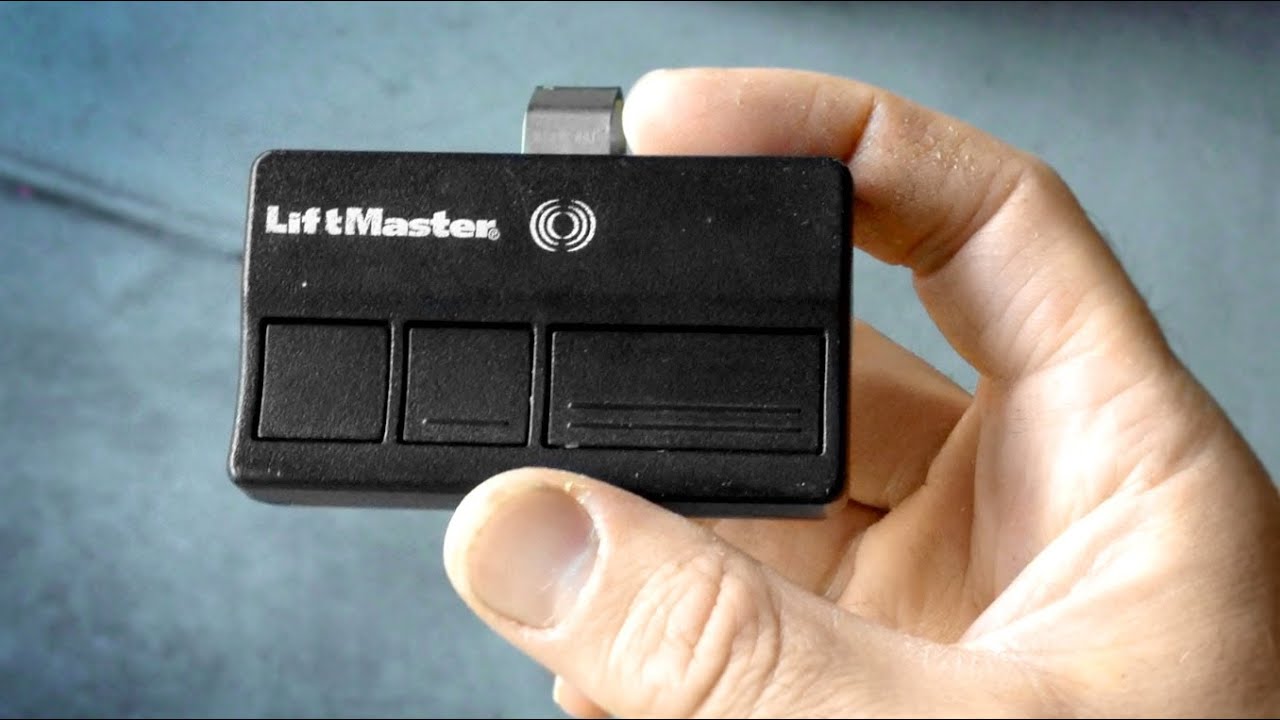
Understanding Your LiftMaster Remote
Before diving into the programming process, it’s essential to have a clear understanding of your LiftMaster remote. These remotes typically come in different models, each with its own set of features and capabilities. Familiarize yourself with the buttons, such as the open, close, and program buttons, as well as any additional features or settings your remote may have. Take a moment to read the user manual or visit the LiftMaster website for detailed information specific to your remote model.
Step 1: Locate the “Learn” Button on Your Garage Door Opener
The first step in programming your LiftMaster remote is to locate the “Learn” button on your garage door opener. This button is often located near the antenna wire or is labeled directly on the opener. Once you’ve found the button, ensure that it is easily accessible for the programming process. In some cases, the “Learn” button may be hidden under a small panel or cover that needs to be removed. Refer to your garage door opener’s manual or the manufacturer’s website for specific instructions on finding the “Learn” button.
Note: If your garage door opener does not have a “Learn” button, it may use a different programming method. Consult your user manual or contact LiftMaster’s customer support for assistance with alternative programming methods.
Step 2: Clear Existing Codes on the Garage Door Opener
After finding the “Learn” button, the next step is to clear any existing codes on your garage door opener. This ensures that only the programmed remotes can operate your garage door. To clear the codes, press and hold the “Learn” button until the indicator light on the opener turns off. The exact duration may vary depending on your model, so refer to the user manual for precise instructions.
Tip: If you are unsure whether your garage door opener has existing codes, it is always a good idea to clear them for a fresh start.
Step 3: Program Your LiftMaster Remote
Now that your garage door opener is cleared of any existing codes, it’s time to program your LiftMaster remote. The programming process may slightly differ depending on your specific LiftMaster model, but the general steps are as follows:
- Press and release the “Learn” button on your garage door opener. The indicator light on the opener will begin to blink, indicating that it is ready to receive the remote’s signal.
- Within 30 seconds, press and hold the button on the LiftMaster remote that you want to program. This could be the open, close, or any auxiliary button, depending on your model.
- Continue to hold the remote button until the indicator light on the garage door opener blinks, indicating that the programming is successful.
- Release the button on the remote. Your LiftMaster remote is now programmed and ready to use.
Troubleshooting: If the indicator light on your garage door opener does not blink after following the steps above, repeat the programming process from Step 3. Make sure to hold the remote button firmly and within the specified time frame.
Step 4: Test Your LiftMaster Remote
After successfully programming your LiftMaster remote, it’s essential to test its functionality to ensure it operates the garage door smoothly and securely. Stand within a reasonable distance from the garage door opener and press the programmed button on the remote. The garage door should respond by opening or closing accordingly. If the door doesn’t respond as expected, repeat the programming process or consult your user manual for troubleshooting tips.
Tip: It’s recommended to test your LiftMaster remote periodically to ensure it continues to function properly. Regular maintenance and battery replacement are important to keep your remote in optimal condition.
Additional Tips for Programming Success
Programming a garage door opener with a LiftMaster remote can be a straightforward process if you follow the necessary steps. However, to ensure a smooth setup and avoid any potential issues, consider the following additional tips:
1. Check for Interference
Before programming your LiftMaster remote, make sure there are no sources of interference near your garage door opener. Other electronics, such as wireless routers or cordless phones, can disrupt the signal transmission, resulting in programming failure. Temporarily disable or move any potential sources of interference away to ensure a strong and uninterrupted signal during the programming process.
2. Consult the User Manual
Every LiftMaster remote model may have different programming instructions and features. It’s important to consult the user manual specific to your remote to ensure you’re following the correct steps. The user manual will provide detailed explanations, troubleshooting tips, and other pertinent information that will assist you in successfully programming your LiftMaster remote.
3. Seek Professional Assistance if Needed
If you encounter difficulties during the programming process or if you’re unsure about certain steps, don’t hesitate to seek professional assistance. Local garage door technicians or the LiftMaster customer support team can provide guidance and resolve any complications you may encounter. It’s better to seek help than to risk making errors that could result in an improperly programmed remote or potential damage to your garage door opener.
By following these steps and tips, you can confidently program your LiftMaster remote for a seamless garage door operation. Say goodbye to manually opening and closing your garage door and enjoy the convenience and ease provided by a programmed LiftMaster remote.
# Key Takeaways: How to Program a Garage Door Opener with a LiftMaster Remote
Instructions for Programming a LiftMaster Remote
- Make sure the garage door opener is compatible with a LiftMaster remote.
- Locate the “Learn” button on the garage door opener motor unit.
- Press the “Learn” button and release it.
- Within 30 seconds, press and hold the button on the LiftMaster remote you want to program.
- Release the remote button when the garage door opener light flashes or clicks.
Frequently Asked Questions
Are you struggling to program your LiftMaster remote for your garage door opener? Look no further! We’ve got the answers to your most pressing questions.
1. How do I program a garage door opener with a LiftMaster remote?
Programming your LiftMaster remote is a fairly simple process. Start by locating the “Learn” button on your garage door opener. Press and release the “Learn” button, and then within 30 seconds, press and hold the button on your remote that you wish to program. After a few seconds, the garage door opener light should flash, indicating that the programming was successful. Repeat this process for each remote you want to program.
It’s important to refer to your specific model’s manual for any additional steps or variations in the programming process. If you’re still having trouble, reaching out to LiftMaster’s customer support can provide further guidance.
2. Can I program multiple LiftMaster remotes for the same garage door opener?
Absolutely! LiftMaster remotes are designed to be compatible with multiple garage door openers. To program multiple remotes, follow the same steps as mentioned earlier. After successfully programming the first remote, repeat the process for each additional remote. Each remote will have its own unique button to program, allowing multiple users to operate the same garage door opener.
Remember that some models may have specific instructions or limitations when it comes to programming multiple remotes. Always check your model’s manual for accurate information.
3. What should I do if my LiftMaster remote is not working after programming?
If your LiftMaster remote is not working after programming, there are a few troubleshooting steps you can take. First, check the battery to ensure it has enough power. If the battery is low, replace it and try reprogramming the remote. Additionally, check that you followed the programming instructions correctly, making sure to press and hold the buttons as required.
If the remote still isn’t working, try resetting the garage door opener by unplugging it from the power source for a few seconds and then plugging it back in. After the opener restarts, attempt to program the remote again. If none of these steps resolve the issue, it may be necessary to contact LiftMaster customer support for further assistance.
4. Can I program a LiftMaster remote without access to the garage door opener’s “Learn” button?
Unfortunately, programming a LiftMaster remote typically requires access to the garage door opener’s “Learn” button. The “Learn” button is an essential component in the programming process, as it allows the opener to recognize and sync with the remote. Without it, the remote cannot be successfully programmed. For more specific information and alternative programming methods, consult your LiftMaster model’s manual or contact customer support.
5. How often should I reprogram my LiftMaster remote?
In general, you shouldn’t need to reprogram your LiftMaster remote regularly. Once programmed, the remote should retain its settings unless the battery needs to be replaced. However, if you find that your remote is not functioning as expected or is no longer operating the garage door opener, first check the battery and replace it if necessary. If the issue persists, attempt to reprogram the remote using the steps provided earlier. Reprogramming should only be necessary if there is a specific issue with the remote or its connection to the opener.
Always refer to the user manual for your specific LiftMaster model for accurate information on programming and troubleshooting.
Summary
So, to wrap it up, programming a LiftMaster remote for your garage door opener isn’t as hard as it may seem! First, locate the learn button on the opener motor and press it. Then, press and hold the button on the remote until the lights on the opener flash. That’s it! Your remote should now be programmed and ready to use.
Remember, each LiftMaster model can have slightly different instructions, so always check the manual for your specific opener. And if you run into any trouble, don’t hesitate to ask an adult for help. With a bit of patience and following the steps, you’ll be operating your garage door like a pro in no time!